前言
某日,突然产生想法,给我自己做的纪念日的APP加一个主题色的功能,那自然就需要用到颜色选择器了,在网上搜索了一圈,没找到自己想要的,于是干脆就自己做一个吧。刚好最近也在研究Kotlin,于是就拿Kotlin写了一个简单的颜色选择器
先上效果图:
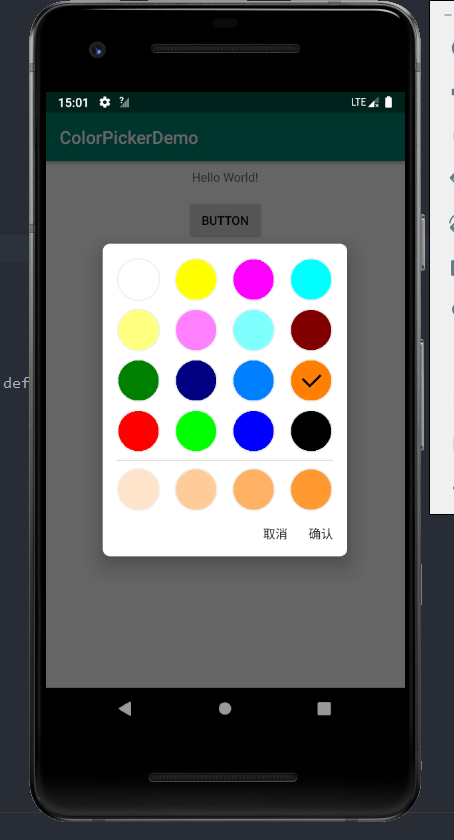
颜色盘
颜色选择器最基本的元素就是单个的颜色控件了,简单的颜色控件设计只需要一个单色的圆加上边框就行,就直接用View画了
首先定义好ColorPane所需要的自定义属性,包括颜色属性,边框颜色和边框宽度
1
2
3
4
5
| <declare-styleable name = "ColorPane">
<attr name="color" format="color" />
<attr name="strokeColor" format="color" />
<attr name="strokeWidth" format="dimension" />
</declare-styleable>
|
然后新建ColorPane类继承自View,在构造器中,处理从xml中解析的相关属性
1
2
3
4
5
6
7
8
9
| init {
val attrArray = context.obtainStyledAttributes(attrs, R.styleable.ColorPane)
color = attrArray.getColor(R.styleable.ColorPane_color, 0)
strokeColor = attrArray.getColor(R.styleable.ColorPane_strokeColor, 0)
strokeWidth = attrArray.getDimension(R.styleable.ColorPane_strokeWidth, 0f)
attrArray.recycle()
}
|
然后重写父类的onDraw方法,在画布上画出一个实心圆和边框,onDraw方法如下:
1
2
3
4
5
6
7
8
9
10
11
12
13
14
15
16
17
18
19
20
21
22
23
24
25
26
27
28
29
30
31
32
33
34
35
36
37
38
| override fun onDraw(canvas: Canvas?) {
super.onDraw(canvas)
paint.color = color
paint.style = Paint.Style.FILL
canvas?.drawCircle(width.toFloat() / 2, height.toFloat() / 2,
(min(width, height) / 2 - if (strokeWidth > 0) 1 else 0).toFloat(), paint)
if (strokeWidth > 0) {
paint.color = strokeColor
paint.style = Paint.Style.STROKE
paint.strokeWidth = strokeWidth
canvas?.drawCircle(width.toFloat() / 2, height.toFloat() / 2,
(min(width, height) / 2).toFloat() - (strokeWidth) / 2, paint)
}
if (checked) {
val bright = (color.and(0x00FF0000).ushr(16) * 0.3
+ color.and(0x0000FF00).ushr(8) * 0.6
+ color.and(0x000000FF) * 0.1)
if (bright > 0x80 || color.toLong().and(0xFF000000).ushr(24) < 0x20) {
paint.color = Color.BLACK
} else {
paint.color = Color.WHITE
}
val lineWidth = height.toFloat() / 20
val offsetX = -width.toFloat() / 32
val offsetY = height.toFloat() / 8
paint.style = Paint.Style.STROKE
paint.strokeWidth = lineWidth
canvas?.drawLine(width.toFloat() / 3 + offsetX, height.toFloat() / 3 + offsetY,
width.toFloat() / 2 + lineWidth / 2.828f + offsetX,
width.toFloat() / 2 + lineWidth / 2.828f + offsetY, paint)
canvas?.drawLine(width.toFloat() / 2 + offsetX, height.toFloat() / 2 + offsetY,
width.toFloat() / 4 * 3 + offsetX, width.toFloat() / 4 + offsetY, paint)
}
}
|
其中,通过对checked的判断,以确定当前控件是否被选中,如果被选中,计算当前颜色的深度,然后在画布中绘制一个勾
颜色选择视图
颜色选择器视图可以使用GridView实现,将ColorPane作为GridView的子项,同样的,首先自定义一些属性
1
2
3
4
5
6
7
8
| <declare-styleable name="ColorPickerView">
<attr name="colorResource" format="reference" />
<attr name="colorPaneSize" format="dimension" />
<attr name="colorPaneStroke" format="color" />
<attr name="horizontalSpacing" format="dimension" />
<attr name="verticalSpacing" format="dimension" />
<attr name="numColumns" format="integer" />
</declare-styleable>
|
然后定义视图的布局,这里我使用了一个LinearLayout作为父布局,实际上可以直接继承GridView实现的,如果直接继承GridView,则不需要这个布局文件,在加一层父布局的好处是可以添加一些额外的东西
1
2
3
4
5
6
7
8
9
10
11
12
| <?xml version="1.0" encoding="utf-8"?>
<LinearLayout xmlns:android="http://schemas.android.com/apk/res/android"
android:layout_width="wrap_content"
android:layout_height="wrap_content"
android:orientation="vertical">
<GridView
android:id="@+id/grid_view"
android:layout_width="wrap_content"
android:layout_height="wrap_content"
android:numColumns="auto_fit" />
</LinearLayout>
|
然后新建ColorPickerView继承自LinearLayout,在构造器的初始化代码中进行初始化操作
1
2
3
4
5
6
7
8
9
10
11
12
13
14
15
16
17
18
19
20
21
22
23
24
25
26
27
28
29
30
31
| init {
LayoutInflater.from(context).inflate(R.layout.layout_color_pick_view, this)
gridView = findViewById(R.id.grid_view)
val attrArray = context.obtainStyledAttributes(attrs, R.styleable.ColorPickerView)
val colorResourceId = attrArray.getResourceId(R.styleable.ColorPickerView_colorResource, 0)
colorPaneSize = attrArray.getDimension(R.styleable.ColorPickerView_colorPaneSize, 0f)
val horizontalSpacing = attrArray.getDimension(R.styleable.ColorPickerView_horizontalSpacing, 0f)
val verticalSpacing = attrArray.getDimension(R.styleable.ColorPickerView_verticalSpacing, 0f)
val numColumns = attrArray.getInt(R.styleable.ColorPickerView_numColumns, 0)
colorPaneStroke = attrArray.getColor(R.styleable.ColorPickerView_colorPaneStroke, 0)
attrArray.recycle()
viewWidth = colorPaneSize * numColumns + horizontalSpacing * (numColumns - 1)
if (colorResourceId != 0) {
val colorStrings = context.resources.getStringArray(colorResourceId)
setColors(colorStrings)
}
gridView?.onItemClickListener = this
gridView?.columnWidth = colorPaneSize.toInt()
gridView?.horizontalSpacing = horizontalSpacing.toInt()
gridView?.verticalSpacing = verticalSpacing.toInt()
if (numColumns != 0) {
gridView?.numColumns = numColumns
}
}
|
这里我们还需要实现一个适配器,提供给GridView,适配器的代码如下
1
2
3
4
5
6
7
8
9
10
11
12
13
14
15
16
17
18
19
20
21
22
23
24
25
26
27
28
29
30
31
32
33
34
35
36
37
38
39
40
41
42
43
44
45
46
47
48
49
50
51
| class ColorPickerListAdapter
(context: Context?, colors: ArrayList<Int>, colorPaneSize: Int, colorPaneStroke: Int):
BaseAdapter() {
private var colorPaneList: MutableList<ColorPane> = mutableListOf()
init {
val layoutParams: ViewGroup.LayoutParams =
if (colorPaneSize == 0) {
ViewGroup.LayoutParams(ViewGroup.LayoutParams.MATCH_PARENT,
ViewGroup.LayoutParams.MATCH_PARENT)
} else {
ViewGroup.LayoutParams(colorPaneSize, colorPaneSize)
}
for (color in colors) {
val colorPane = ColorPane(context!!)
colorPane.layoutParams = layoutParams
if (colorPaneSize == 0) {
colorPane.layoutParams = ViewGroup.LayoutParams(ViewGroup.LayoutParams.WRAP_CONTENT,
ViewGroup.LayoutParams.WRAP_CONTENT)
} else {
colorPane.layoutParams = ViewGroup.LayoutParams(colorPaneSize, colorPaneSize)
}
colorPane.color = color
colorPane.strokeColor = colorPaneStroke
colorPane.strokeWidth = colorPaneSize.toFloat() / 32
colorPaneList.add(colorPane)
}
}
override fun getItem(position: Int): Any {
return colorPaneList[position]
}
override fun getCount(): Int {
return colorPaneList.size
}
override fun getView(position: Int, convertView: View?, parent: ViewGroup?): View {
return colorPaneList[position]
}
override fun getItemId(position: Int): Long {
return position.toLong()
}
fun setItemColor(position: Int, color: Int) {
colorPaneList[position].color = color
}
}
|
完整的代码已同步至GitHub,可以前往GitHub查看